So, you've seen how wickedly awesome my blog is and you want one of your own (cough). Not a problem.
Starting your own blog is actually a lot easier than you think. You can be up and running in a couple of hours, depending on how fast you work, and could even have your first post up by the end of the day.
Everyone blogs differently, but things are mostly the same at the start: You choose a domain, get some hosting space, find a design you like, stuff like that. It's not difficult, but will cost you a little bit of money and you might want to punch your screen a couple of times.
I've laid everything out step-by-step below, in as simple a way as I could. Hopefully it's all crystal clear but if not, don't be afraid to leave your questions in the comments.
Let's go!
Quick note: If you're blogging as a hobby, a good option is a free blogging platform. My recommendation is WordPress.com, which is 100% free. There will be some limitations when it comes to customisation. For a serious blog that could potentially become a business, you'll want a self hosted blog which is what I'll talk about below.
Why start a blog?
Why are blogs important? What purpose do they serve?
There are a million different answers.
A blog is a platform. It represents your voice. You can use it to share stories, influence people, inspire, educate, debate, entertain. It is a creative outlet. It allows you to express yourself freely in a world where we can't always do so. It allows you to share your message, and most importantly, it allows people all over the world to find you.
I've had conversations with people from places as remote as Iran and Ecuador about how they can travel more, live simpler lives and follow their passions in life. It is the blog that makes these connections possible.
When you're passionate about something, you usually have a desire to share it. You can think of your blog as your own newspaper or magazine, where you control the stories. If you have something valuable to say (and most of us do), a blog can allow you to explore your passions further, and connect with people who share the same passions as you.
In other words, a blog connects you to the world.
Step 1: Choosing your blog name and domain
Choosing the right name is important.
It's what identifies your little space on the web. You want a name you're proud of, a name that is memorable and a name that uniquely identifies you.
You also want to get it right the first time. Changing your domain name is like going through a re-brand (a lot of work).
Some tips:
- Think long term. Choose a name you can expand on. If I had called it www.breninthephilippines.com, I would've been stuck with a domain restricted to Philippines related content. What happens when I travel somewhere else?
- Make sure your blog name is available on all major social networks (Facebook, Twitter, Instagram, Pinterest), and sign up for them immediately.
- Spend some time reading other blogs in your niche and find out which ones have stood the test of time. What did they name their blog? Use this to help you generate ideas, but also remember you need to be original.
- Don't choose something people might misspell easily. For example, www.travellingwithbrendan.com isn't ideal because in international English it's spelt "travelling" but in American English it's "traveling". Make it as easy as possible for people to find you.
- Write it out in your email signature. How does it look? Introduce your blog to the mirror. How does it sound? Make sure you like it!
Once you've chosen a name you'll register the domain with your web host, which we'll talk about in the next step.
Step 2: Choosing a web host
Web hosting is like renting a piece of land for your blog. You pay a hosting company for some space on the internet and they let you build your blog there.
It sounds daunting, but don't worry - it's very straightforward.
Who should you host with?
After using around 10 different web hosts over the years, I've got a pretty good idea of what you need when hosting.
After several hosting disasters, and now as the owner of a large portfolio of sites, my #1 recommendation for new blog owners is Dreamhost. Almost all of my sites are hosted with them, except for my biggest site (this blog, which is hosted with Pressidium).
For hosting a new site, Dreamhost is easily the best I've found in terms of affordability and service - it's just as cheap as the budget hosts, but the support is still great! Here's what I love about them:
- WordPress pre-installed for you (saves so much time).
- Super affordable, $2.49 per month for your first site.
- Free domain name
- Free SSL certificates
- SSD storage
- Unlimited traffic!
- Great support
Simply head to their homepage to get started, or if you're brand new to site building and need some help getting set up, just click the blue box below for a step-by-step guide.
Let's get your web hosting set up! This should only take us 5 minute (or less).
First, head to the Dreamhost homepage by clicking here, and click the WordPress hosting button:

Then you'll want to select the Starter plan.
This is the cheapest plan and if you're starting a brand new blog, will be more than sufficient for you:

Click the "Sign up now" button and you'll get taken to domain registration.

You get a free domain name when you host with Dreamhost, which will save you around $10 per year (nice!)
Click "Register a new domain."

If you know what domain you want, enter it here.
Otherwise, go back to the previous step in this guide, and have a think about what domain you would like.
Once you're ready, enter the domain and click "Add for $0", and you'll be taken to payments.

At the payments page you'll have the option to pre-install WordPress. Keep this checked! It will save you some time and trouble, and will allow you to get building your site right away.
The DreamShield and Dreamhost Email add ons are not necessary and will cost you extra, so you can remove them.
Once you're ready you can click Pay and you're done. You card will be charged and you're now the owner of a brand new WordPress site!
Step 3: Install WordPress
WordPress is the most widely used and widely supported blogging platform there is, and I highly recommend you use it. Most hosts have an install wizard for you, and even if they don't you can install it yourself if you're not a complete computer newbie.
If you're hosting with Dreamhost it's even better - they pre-install WordPress on your hosting account for you. So if you've signed up with Dreamhost, you can skip this step and go on to the next one.
If for some reason you unchecked the "pre-install WordPress" option during signup, don't worry. Dreamhost has a one-click WordPress install you can use.
Just head to the One Click Installs option in your Dreamhost dashboard:

That should take you to the WordPress Installer. Just choose your domain name from the drop down box and click "Install it for me".

The installer will do its thing and in a few minutes you have WordPress ready to go 😉
Step 4: Login to your WordPress site
Once you've gone through the steps, Dreamhost will present you with the URL to log in to your WordPress site.
It should look like: www.yourblog.com/wp-admin (obviously you'll replace yourblog.com with whatever your domain name is).
The login page should look something like this:

Simply log in with the username and password you've been provided. If you don't know what it is, contact support and they will resend the credentials to you.
Step 5: Choose a theme
You need to decide what your blog is going to look like.
To do this you are going to need to choose a "theme". You have 3 options here - free, premium and custom. I'll explain all three below.
Note: I want to stress that you don't need to buy a theme right away. It's perfectly fine to build your blog on a free theme for a few months, even a year, while you find your footing. If you can't afford to fork out cash for a theme from the beginning, don't worry about it. Just start writing!
Free theme
In the left hand side of your screen you'll see your WordPress menu. Go to Appearance > Themes.

There you'll be able to search through a library of themes, and many of them will be free. Just try them out and see which one you like! You can also Google "free WordPress themes" and you'll be spoiled for choice.
Premium Theme
The downside to using free themes is they're often lower quality than ones you pay for (obviously) and sometimes the developer of the theme will stop updating it, leaving you with an out-of-date theme which can lead to security and functionality issues. The alternative is to buy a "Premium" theme which will provide a slicker, more secure design.
The blog you are reading right now is created with Thrive Theme Builder.
This is a premium theme that allows you to completely customise your site to look exactly the way you want. It's all drag-and-drop and very intuitive to use. I also made a video showing you exactly how I created the design you're looking at right now, step by step. Check it out here:
Step 6: Set up your pages
Your blog is going to have several different pages. By default your theme should already have a home page, but you're also going to want to set up an About page and a Contact page (and any other page you can think of).
This is easy - just go to Pages > Add New:

Then, write your page content and click Publish.
After that you'll need to add the page to your menu. To do this, go to Appearance > Menus. Select the menu you want to add it to from the dropdown box at the top. Then select your newly created page from the left hand side and click "Add to Menu". Easy, right?
Step 7: Write your first post
You'll now be ready to finally write your first post. Just go to Posts > Add new and start writing!

By now you might be feeling a little overwhelmed, but relax. Everything in WordPress is pretty easy to figure out and after a couple of weeks of messing around inside the dashboard you'll know your way around. Don't be afraid to click things, it won't break!
Step 8: Create a logo/brand
If you want to stand out, you're going to need some sort of brand or logo that people recognise you by. I noticed most bloggers have modest little logos (which I've since learned is a good idea), but I wanted mine to be big and loud. So for my first blog design, I created a big huge fancy logo, which was easier than I thought.
The problem was, even though I knew exactly what I wanted in my head I had no idea how to create it on a computer. So, I went to Upwork and found someone to do it for me. I sketched my design the best I could on paper, took a photo of it, and then sent it to a cartoonist to actualise it for me.
Here's what I sent him originally:
I'm no artist, but that doesn't matter - all you need is an idea. He discussed a few more thoughts with me and after some sketches we turned it into this:
 And then this:
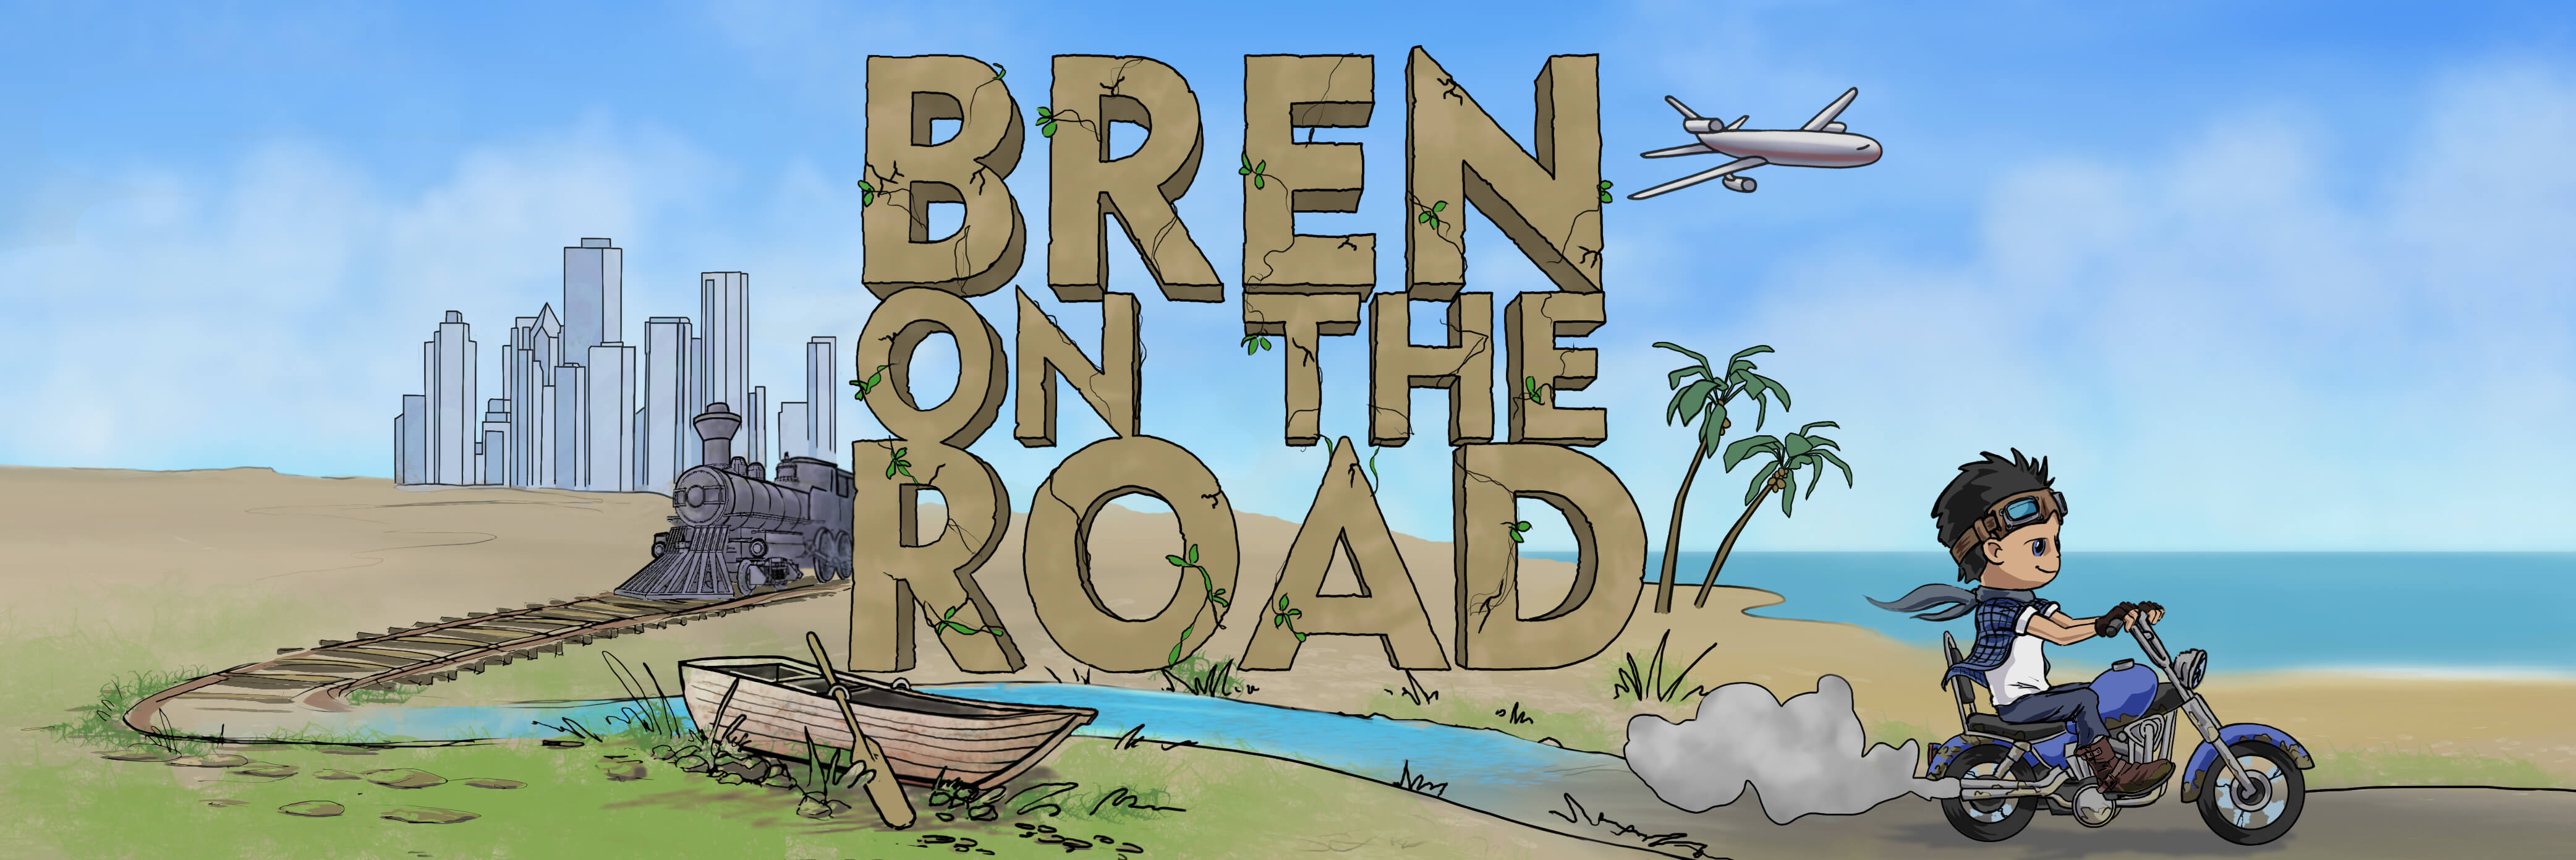
And finally this:

You don't need to be a computer whiz or even a very good artist to make a logo for yourself. You just need an idea and someone will be able to bring it to life for you.
What's it cost to get something like this done? You'd be looking at maybe $100-$200, depending on who you choose. If you're on a tighter budget, Fiverr is a really good place to get a simpler logo done, and there are decent designers there who will put something together for as little as $5! If you have a bit more money to play with, give 99designs a go. They're pricey, but they have a money back guarantee and a good crop of active designers.
Lastly, remember this fancy design part isn't vital. There are a ton of blogs infinitely more successful than mine that just use simple text titles with no fancy artwork at all. Google's logo is a good example - a six year old could've made it.
Step 9: Before you go live
By now you should have a web host, a domain name, some posts and pages, a cool WordPress theme and your own blog logo. However, you're not ready to go live just yet.
Here are a few things I'd recommend doing before you start sharing your site with everyone:
Write around 10 posts
It seems kind of dumb to take your blog live when you've only got one post. My goal was to have 10 posts already written so when people came to my blog for the first time they had a few articles to keep them around for a while.
As it turned out, when my blog first went live I got friends telling me they'd read all my posts and were waiting for more - something that would never have happened if I only had one or two posts up.
Set yourself up on social media
Set up pages on Facebook, Twitter and Pinterest so that people who like your stuff can follow along and stay updated.
In my first month pretty much all my traffic came from Facebook, and quite a few posts went viral from there too.
You might also consider setting up accounts on Youtube, StumbleUpon and Instagram (many bloggers use their personal Instagram and Twitter accounts, however you definitely will need to start a separate page for Facebook).
Start an email list
I love using email to keep in touch with my readers, and have a newsletter and various courses that get sent to my subscribers.
As a newbie blogger, I highly recommend using Mailerlite. They're easy to use and they're free for up to 1,000 subscribers.
To start building your list, you'll need to sign up to Mailchimp and then start adding subscribe boxes to your site. All the instructions are there when you sign up and it's straightforward.
Install important plugins
To add functionality to your WordPress blog you will be using add-ons known as "plugins". Plugins add cool functions to your blog, such as adding "Like" buttons to your posts and securing your site so spammers won't mess with you. To install a plugin just go to your menu, then go to Plugins > Add New:

Then, search for the plugin you want in the search box and click "Install". Once it's finished installing, click "Activate". After that it should be plugged in and working!
Here's a few I'd recommend starting off with:
Wordfence Security - Monitors who logs in and out of your account and provides real-time security, anti-virus and firewall.
Akismet - Spam filter for comments (you will get a lot of spam comments).
BackWPUp - Allows you to schedule regular backups of your site in case shit happens.
Jetpack by WordPress.com - Provides a whole bunch of cool features like site stats, subscriber lists and comments sections (and heaps more).
iThemes Security - All-round security to keep your site safe.
W3 Total Cache - Improves your site load time.
WordPress SEO by Yoast - Helps optimise your blog's content so it can be found easily by search engines.
Get feedback
Before I went live I shared my blog with a few close friends and asked them what they thought.
It's important you can ask people who aren't afraid to be honest with you. If your blog looks shit, you want them to be able to say it looks shit without worrying about offending you, because when real visitors come to your blog and it looks shit they'll leave and never come back.
Ask your friends to tell you what they don't like about your site, rather than what they do like - that will be far more useful criticism to help you turn your blog into something people will enjoy reading. By this time you'll probably have spent many hours staring at your site so don't underestimate the value of a fresh pair of eyes. They will see things that you don't.
Step 10: After you go live
Promoting your blog
The first thing with promotion is to make sure your content is actually worth promoting. Nobody shares stuff that's mediocre, people only share stuff that's awesome. This is often termed "Wow content".
Make sure all your stuff is Wow content before you start asking people to promote it.
For a small tugboat blog that's just getting off the ground, social media is going to be one of your best friends. Places like Facebook, Twitter, Stumbleupon and Pinterest can be great traffic generators. Make sure you're active on these platforms and are sharing your work as it's published. Sharing your work on your personal accounts is good too - your friends will be some of your most loyal fans!
Guest posts are also great for exposure. For example, my guest post on Our Awesome Planet brought me several thousand page views. You can also host guest posts or interviews like my interview series on Solo Female Travel. Both are good ways to bring in new readers and make connections.
Another good strategy is to ask relevant Facebook pages (keyword here is relevant) if they'd be willing to share your work. For example, if you write something about New Zealand, reach out to different Facebook pages about New Zealand and ask if they'll be willing to share your article. If your content is awesome you'll get a few yeses!
Lastly, reach out to other people in your niche and get to know them.
Get in touch with the bloggers who inspire you and give them props on their work.
I have a few blogging role models - Migrationology, Legal Nomads and Wandering Earl to name a few, and they all know I think they're awesome because I've reached out to them and told them. I also ask them for advice now and then, and even arranged meetups in person.
I'm always connecting with new bloggers and it's been beneficial in many ways. The blogging community is cool and friendly for the most part; I've gotten a lot of help and I always pay it forward too when newbie bloggers contact me often asking for advice.
SEO
Search Engine Optimisation is the practice of making your website rank highly in search engines so people can find you. It's a large topic and impossible for me to explain here, plus to be honest I don't know that much about it.
If you're interested in learning, two good (and free) beginner's guides are The SEO Strategy You Can Build An Empire Around and The Beginner's Guide to SEO.
Personally, I don't do a lot of SEO (I use the Yoast plugin I mentioned above and that's pretty much it). It's a constantly changing environment which makes it hard to keep up with.
For me, I focus my time on writing content that I (and hopefully my readers) love. That's what's important to me.
Monetisation
Now, you're probably wondering when the money starts flowing. Sorry to disappoint, but if you ask any travel blogger they'll tell you the money is better flipping burgers at McDonald's. Many bloggers will go at least 6-12 months, working hundreds of hours on their sites without even earning a dime. If it's money you're after, you're better off spending your time elsewhere.
There are various ways to make money from your blog. These are the most common:
Advertising - Through either direct advertising or ad networks, you can place banners and text ads on your website and get paid either per click or a flat rate. Google Adsense is probably the most popular and easiest to get approved for.
Selling products and services - You can create your own products to sell, such as my ebook Triple Your Travel, or offer services such as freelance writing, consulting or design.
Affiliate marketing - You can promote other people's products and earn a commission when you make a successful referral. This is a great option because you don't need to develop a product but can still offer something of value.
As an example, my Resources page contains several affiliate links. If someone makes a purchase through the links there I will earn a commission (at no extra cost to the buyer). It really is a win-win-win. If you would like to find affiliate products to promote, I would recommend using an affiliate network. Here are some I can recommend:
- Flex Offers - It is a bit of a process to get approved for this network, but they have very good merchants so it is worth the effort.
- Share A Sale - This is a smaller affiliate network and easier to get approved for, and it still has many good merchants. There is not much here for me to promote but depending on your blog you might find something that fits with your theme.
- Affiliate Window - Another good affiliate network with a good selection of merchants. There are one or two items for here that I've promoted regularly.
- Commission Junction - Quite a large network that has a large range of advertisers.
- Amazon - Amazon's affiliate program is one of the largest on the web. Commissions are very low but since Amazon sells almost everything you will definitely find something that fits.
Sponsored content/reviews - Companies will pay you to publish a post promoting their product/service, such as a hotel, an app or a gadget. I don't do this, but many bloggers make an income this way.
Partnerships/ambassadorships - Longer term relationships where certain brands will pay you to endorse and promote their product/service. Common arrangements in the travel industry are tourism boards paying bloggers to promote a destination or experience or companies asking bloggers to use and endorse their products (such as cameras/apps/travel gear).
As a portfolio to land freelance work - Whether you're into photography, video or writing, your blog is the ideal portfolio to showcase your work. I've landed various freelance writing gigs from my blog and always include my blog in my pitches.
There are many other ways to make money from your blog, but the above are what I've seen to be the most common. It starts with having an audience. This comes from writing a blog that you're passionate about. Without a readership the money is unlikely to come, and if you're in it for the money you're probably going to be disappointed anyway. Do it because you love what you're writing about and have a desire to share it with the world. The money will present itself eventually.
A complete guide to making money from your blog:
For a more detailed guide to monetisation, check out my post The Practical Guide To Making Money With A Blog. This post is far more in depth and shows you, step-by-step, how to implement the methods mentioned above.
Bonus Step: Tools to help make your blog awesome
Here are a few tools and resources I actively use on this blog. Some you need to pay for and some are free, but all of them will help you create a faster, cooler, more successful blog.
Do note that you probably won't need to worry about the tools listed below right away, and many of them won't make sense to you right now. However, after a few weeks or months you'll understand why they'll be handy, so make sure you keep these on your "check out later" list.
Cloudflare - A free CDN service that speeds your website up considerably! No one likes waiting for websites to load, so if you want loyal readers, make sure your site is fast. If you're hosting with Dreamhost, this tool will already be integrated and you can activate it with just a few clicks in your Dashboard.
Uptime Robot - A free service that monitors your uptime. Every time my site goes down I get an email, and then another message when it goes back up. Very handy.
Picmonkey - Photoshop is way too cool for me, so I use Picmonkey to make all my website's graphics. Sometimes I also use Canva.
Smugmug - I use Smugmug to host all my photos. It means I can keep my photos at optimal quality, keep my bandwidth down, and have my entire photo collection organised in a easy to navigate portfolio. Flickr is a free service with the same functionality, but Smugmug is just simpler, faster and has better support, which I'm happy to pay for.
Thrive Leads - I use this plugin for creating all my subscriber sign up forms and it's been super helpful in building my subscriber base. It's not free but it's easily the best email list plugin I've used so far.
Hootsuite - I use Hootsuite to help manage my social media accounts. It allows me to queue my updates so I don't need to be online 24/7 fiddling with my different channels. Huge time saver and really easy to use.
Mailerlite - I use Mailerlite for my email list, and I highly recommend it. It's free for your first 1,000 subscribers, and you get all the features too! Perfect for newbie bloggers.
Sendowl - I use Sendowl for managing sales and distribution of my ebooks. It is excellent. You probably won't need this until further on in your blogging career but it's good to know about!
For the full list of tools I currently use, check out my Blogging Resources page.
That's it!
So, for those of you who've been asking how I built this blog, that's how!
I self-taught myself most of this stuff so you might find differing advice out there, but this is what has worked for me. As a blogger you'll need to spend a lot of time experimenting with your site and finding what works for you. It's all part of the fun.
If there's anything I've missed or you have questions, leave a comment below and I'll answer it the best I can. Otherwise best of luck, and hope to see you in the blogosphere soon!
-Bren
Note: Some of the links in this article are affiliate links. All items recommended above are resources I use here on my own blog and are honest recommendations. No items are sponsored and I pay for all my resources in full. For further clarification you can read my Disclosure Policy here.
Awesome post- love how honest you are with tips!!
Thanks, glad it helped!
Hi Bren, thanks for the tips. I love reading your blog. I started writing years ago but not a good writer. Hahaha! I have lots of photos from my trips but didn’t post them. Your tips inspired me and I hope I can improve mine.
Very helpful, thanks a lot!
You’re welcome!
Thank you! This is one of the most in-depth guides I have read so far. Appreciate all the details and specific examples.
You’re welcome!
Thank you so much for your post, it is so helpful and full of useful content. We have started a blog and your tips and advice has really helped us. Thank you so much!
Thanks for your very clear, easy to understand instructions. They are by far the best I’ve seen and I’ll be following them and using your links (so hope you get some affiliate income from them.) I love your blog, and I love that you’re a kiwi blogger.
Thank you! The Kiwi blogging commmunity is kind of small, it’s nice to see others join the space. Come back and let me know how your blog comes along 🙂
I have been blogging as a hobby for many years. However I use a free platform, Blogger. It doesn’t cost me anything at all to blog.
Hi Bren,
Thank for explaining in step by step procedure. It will be useful for starting blog.
Amazing!
Thanks so much for this which is the best I have seen on this topic.
Thanks a lot for such a great article. this is so useful to me, I am looking forward for many such wonderful article from you.
This was really an impressive blog! It is easily understandable, your step by step guide is really helpful for one who is going to start a Blogging soon. Thank you
Add the site UptimeControl.net to the article, because only they have a 3-minute site availability check interval on the free plan.
Thanks Bren,
This post is awesome. I am also starting my blog, hope this will help me and I need some help from you. where can i contact you?